How to Remove Engineered Hardwood Floor Without Damage
Are you wondering how building experts like construction companies and contractors remove engineered hardwood floor without damage? Removing flooring can be complex and challenging when renovating or upgrading a commercial or residential space. Fortunately, countless home renovation professionals and amateurs alike face the same challenge. Understanding the removal process is important to achieving flawless results. This guide will explore various methods for removing engineered hardwood floors without causing any damage. Let’s get started!
What is Engineered Hardwood Flooring?
Engineered hardwood flooring is a popular and versatile option. It gives homeowners the look of hardwood with added stability. Unlike solid hardwood, engineered hardwood consists of multiple layers of wood veneer glued together in a cross-grain pattern. This construction enhances stability and reduces the likelihood of expansion and contraction due to changes in temperature and humidity.

Learn more about engineered hardwood floors in our comprehensive blog, “What is Engineered Hardwood Flooring?“
Importance of Proper Removal Techniques to Prevent Damage
As any home improvement professional or DIY expert will tell you, proper removal techniques are key to renovation success. They prevent damage to the subfloor and surrounding areas during the removal of engineered hardwood flooring. However,the layered construction of engineering hardwood and its installation methods make it more challenging to remove. Improper removal techniques, such as excessive force or incorrect tools, can result in irreversible damage to the flooring, subfloor and nearby surfaces.
Fortunately, homeowners can minimize the risk of damage and achieve a successful removal by using appropriate methods and tools. In the upcoming sections, we will discuss contractor-grade expert techniques and tips for removing engineered hardwood flooring without harming your property.
When to Replace Engineered Hardwood Floors?
Knowing when to replace engineered hardwood floors is essential for maintaining the integrity and aesthetics of your space. While engineered hardwood is known for its durability, it is still susceptible to wear and tear. Several factors indicate the need for replacement:
- Visible Damage: Deep scratches, gouges or warping indicate that replacement is necessary.
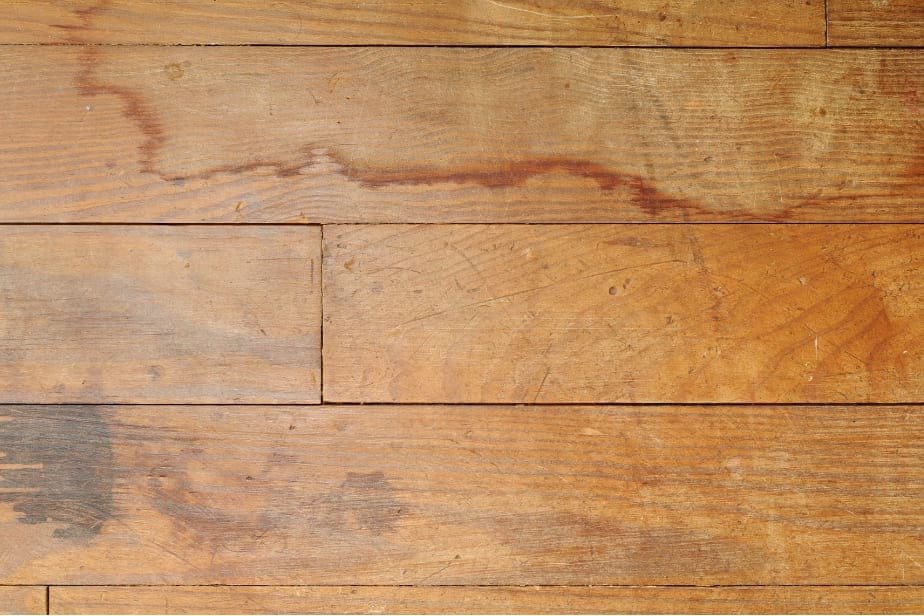
- Water Damage: Cupping, buckling or discoloration caused by water damage also signals the need for replacement.
- Excessive Wear: A worn finish, fading or loss of luster indicates the need for replacement.
- Outdated Style: If the flooring no longer complements your decor, replacing it can refresh your space.
Can Engineered Hardwood Floors be Reused?
One common question many homeowners have for interior designers and contractors the replacement of engineered hardwood flooring is whether they can reuse it. The possibility of reusing engineered hardwood depends on several factors:
- Condition: One can reuse floors that have sustained minimal damage and are still in good condition.
- Installation Method: Flooring installed using the floating method is more likely to be reusable.
- Careful Removal: Proper removal techniques preserve flooring integrity for potential reuse.
Preparation and Safety Measures for Removal
When removing engineered flooring, it’s important to prioritize preparation and safety over speed. Taking extra precautions and proceeding with steady caution ensures a smooth operation and minimizes potential hazards, making the task more manageable and safe for both professionals and DIY-ers.
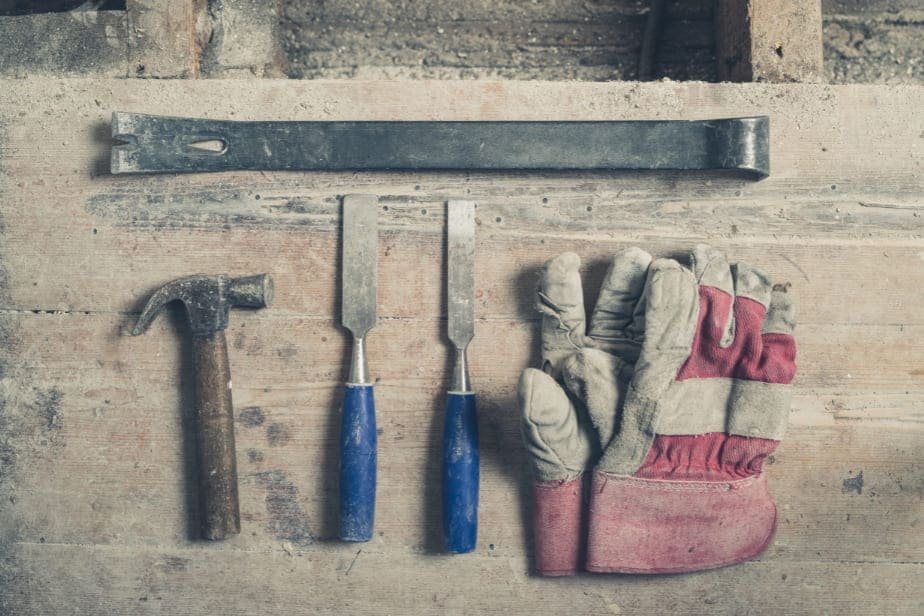
- Gather Necessary Tools: Ensure you have the right tools for the job, including:
- Pry bar or crowbar
- Hammer
- Utility knife
- Gloves
- Safety goggles
- Dust mask
- Knee pads
- Clear the Area: Remove furniture, rugs and other obstacles from the room to create enough space for and maneuverable work.
- Turn Off Utilities: If possible, shut off the electricity, gas and water where the removal will occur. Taking these precautions help prevent accidents and ensures safety.
- Ventilation: Ensure proper ventilation by opening windows and doors or using fans to minimize the amount of dust and fumes generated during removal.
- Protective Gear: Always wear the appropriate protective gear, including gloves, safety goggles and a dust mask, to protect yourself from injuries and airborne particles.
- Inspect for Hazards: Before you remove the flooring, carefully inspect it for protruding nails, staples or other hazards that could harm you during the process.
- Work in Sections: When removing the flooring, it’s best to work in sections. Start at one corner of the room and gradually move across, removing one section at a time. This approach helps you stay organized, prevents the task from overwhelming you, and allows you to control the removal process.
Removing Floating Engineered Hardwood Floor
Follow these steps to remove a floating floor consisting of engineered hardwood planks without causing damage and ensuring a smooth extraction process:
Step-by-Step Guide for Floating Floor Removal
- Prepare the Area: Clear the room of furniture and any obstacles that may ìnterfere with the removal process.
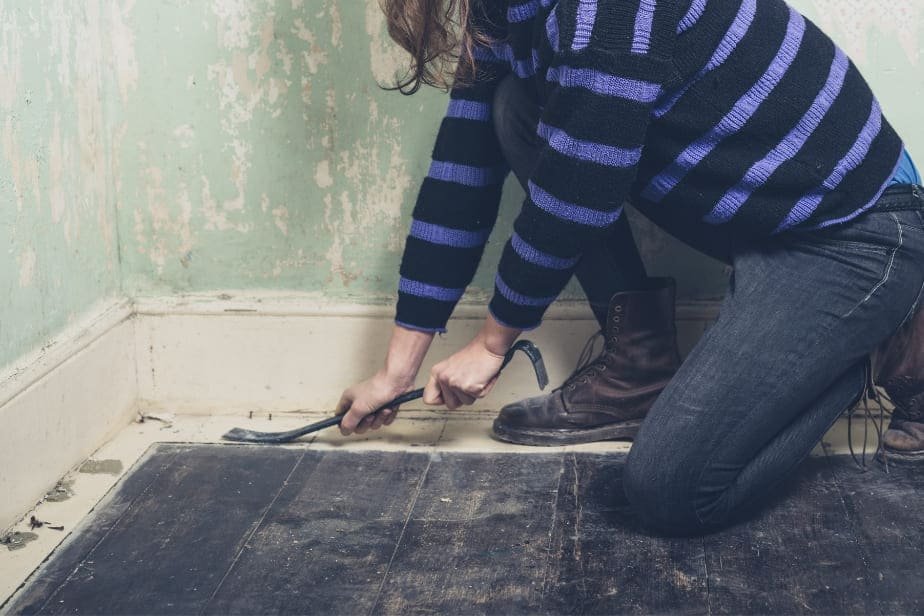
- Start at the Edges: Use a pry bar or crowbar to remove the baseboards or molding around the room’s perimeter.
- Locate the Starting Point: Find the edge of a plank closest to the wall to determine where to begin removing the floor.
- Lift the Planks: Gently lift the edge of the first plank at the starting point using a pry bar or crowbar. Gradually lift and remove each plank along its length.
- Disconnect Interlocking Planks: Carefully lift and twist each interlocked plank to separate it from the adjacent plank.
- Stack and Dispose: Neatly stack the removed planks and dispose of them according to local regulations.
- Inspect Subfloor: After removing all the planks, inspect the subfloor for any damage or debris. Clean and repair it as necessary before installing new flooring.
Tips to Minimize Damage During Removal
- Work Slowly and Carefully: Take your time and avoid rushing the removal process. Rushing can damage the flooring or subfloor.
- Use Proper Tools: Use appropriate tools, such as pry bars or crowbars, to gently lift and remove the planks. It will help avoid unnecessary damage.
- Protect Surrounding Areas: Place protective materials, like cardboard or towels, along walls and adjacent surfaces. It will protect them from any potential damage during the removal process.
- Label and Stack Planks: Label each plank as you remove it. Labeling will make it easier to reinstall or dispose of later. Also, stack the removed planks neatly to prevent warping or damage.
- Inspect Subfloor: While removing the planks, inspect the subfloor for signs of damage or moisture. Address any issues promptly to prevent further damage.
By following these guidelines, you can ensure a careful and successful removal of your floating engineered hardwood floor.
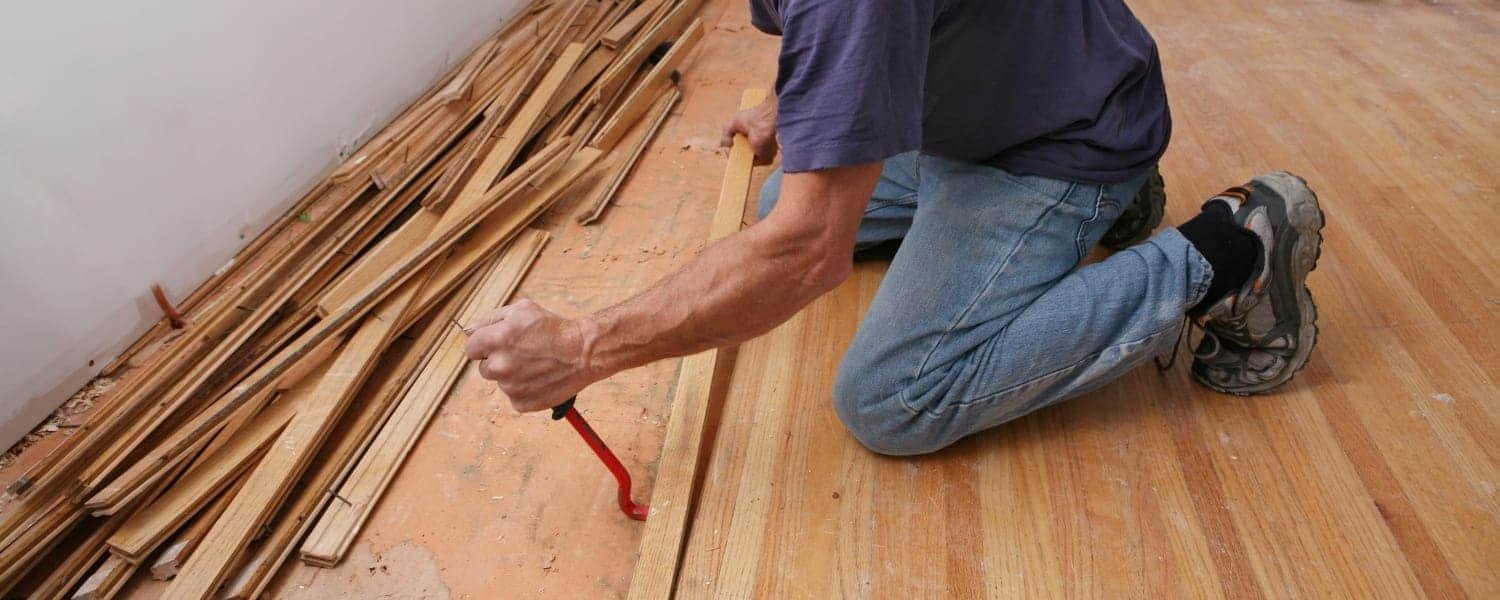
Removing Nail-Down Engineered Hardwood Floors
A systematic approach and the right tools are essential for a successful result when removing nail-down engineered hardwood floors. This section provides a step-by-step guide and useful techniques for efficient removal. It also covers the challenges posed by adhesive residue and nails left behind.
Step-by-Step Guide for Nail-Down Floor Removal
- Prepare the Area: Clear the room of furniture and obstacles to create a safe working environment.
- Locate Nails: Identify and mark the location of nails that secure the engineered hardwood planks to the subfloor.
- Remove Baseboards: Carefully remove baseboards along the room’s perimeter to access the flooring’s edges.
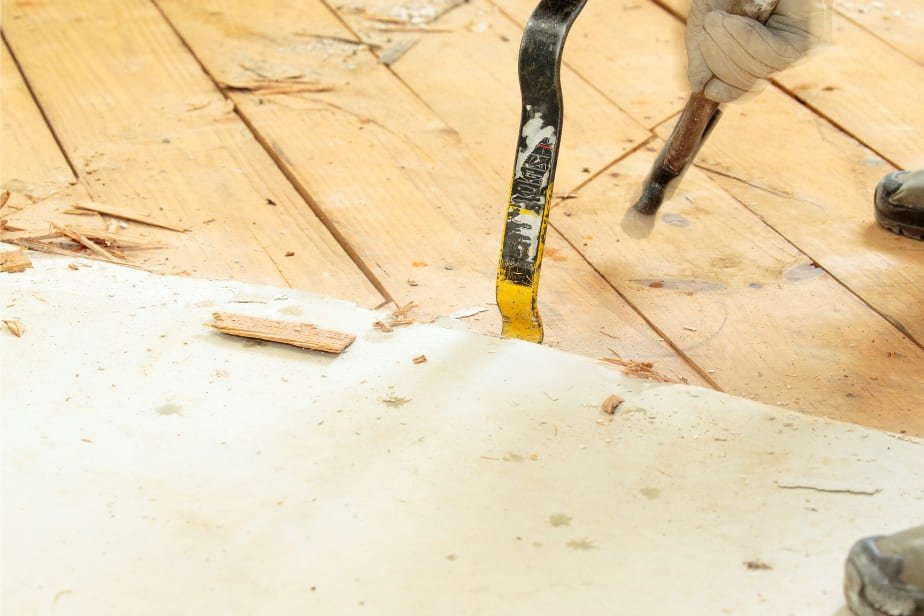
- Start from the Edge: Begin at one edge of the room and use a pry bar or crowbar to lift and loosen the planks.
- Work Methodically: Gradually work across the room, lifting and removing each plank. Pay attention to nails and adhesive as you go.
- Address Stubborn Planks: If you encounter stubborn planks, use a hammer and chisel to carefully pry them loose without damaging the subfloor.
- Dispose of Materials: Responsibly dispose of the removed planks and debris in accordance with local regulations.
- Inspect Subfloor: After the removal, inspect the subfloor for any remaining nails or adhesive residue that may need attention.
Following this guide, you can efficiently and effectively remove nail-down engineered hardwood floors while minimizing potential issues.
Tools and Techniques for Efficient Removal
- Pry bar or crowbar: Made of iron, stainless steel or another hard metal, these leverage-inducing tools are essential for lifting and loosening the planks.
- Hammer and chisel: These tools are handy for applying concentrated force to loosen stubborn planks by breaking up adhesive residue.
- Nail puller: A nail puller helps extract nails from the subfloor efficiently.
- Knee pads: They provide comfort and protection during the removal process.
Addressing Adhesive Residue and Nails
To remove adhesive residue and nails, you can use the following methods:
- Use adhesive remover or solvent to dissolve any stubborn adhesive residue left on the subfloor.
- Fill in nail holes with wood filler and smooth the area to prepare for new flooring installation.
Removing Glued-Down Engineered Hardwood Floors
Removing glued-down engineered hardwood floors requires careful attention and special techniques. This section provides a step-by-step guide for easy removal, tips to overcome challenges and advice on safely detaching glued planks.
Step-by-Step Guide for Glue-Down Floor Removal
- Prepare the Area: Clean the room of furniture and obstacles to create a safe working environment.
- Start from an Edge: Begin at one edge of the room and use a floor scraper or putty knife to lift and loosen the glued planks.
- Work in Sections: Divide the floor into manageable sections and focus on one area at a time to avoid overexerting yourself, as well as allow for the task to be continued the next day if necessary.
- Apply Heat: Use a heat gun or hairdryer to soften the adhesive, making lifting and removing the planks easier.
- Scrape Carefully: Scrape the glued planks using the floor scraper or putty knife. Apply steady pressure to detach them from the subfloor.
- Dispose of Materials: Responsibly dispose of removed planks and adhesive residue by local regulations.
Following this guide, you can successfully remove glued-down engineered hardwood floors with care and efficiency.
Overcoming Challenges During Removal
During the removal process, you may encounter some challenges, including:
- Stubborn Adhesive: If you come across stubborn adhesive, consider using a commercial adhesive remover or solvent dissolve it effectively.
- Subfloor Damage: After the removal, inspect the subfloor for any damage that may have occurred during the process. Make any necessary repairs before installing new flooring.
Safely Detaching Glued Planks
To safely detach the glued planks, follow these steps:
- Avoid applying excessive force when detaching the glued planks. It will help prevent damage to the subfloor as well as cracking, splintering, peeling or other damage to the planks being removed.
- Work slowly and systematically, carefully lifting each plank. Taking your time will minimize the risk of splintering or breakage.
Environmental Considerations for Floor Removal
When removing flooring, it’s important to consider the environment to minimize ecological impact. Here are some key aspects to keep in mind:
- Proper Disposal Methods: Dispose of flooring responsibly to prevent environmental damage and reduce landfill waste. Follow local guidelines for waste separation and recycling when possible.
- Minimize Energy Consumption: Choose removal methods that minimize energy consumption and environmental impact. Consider eco-friendly alternatives, such as mechanical removal techniques or chemical-free solutions.
- Environmental Impact Assessment: Evaluate the removal process’s environmental impact, including energy usage, emission and waste generation. Identify opportunities for improvement and implement strategies to reduce negative effects.
- Sustainable Flooring Options: Explore sustainable flooring options for replacement to promote environmental responsibility. Materials such as bamboo, cork or reclaimed wood are eco-friendly alternatives with a minimal ecological footprint. Additionally, architects and interior designers can be expert sources of information for newer and more innovative environmentally friendly building materials.
Considering these factors, you can prioritize environmental considerations during the flooring removal and contribute to a more sustainable approach.
Post-Removal Floor Care and Preparation
After removing the old flooring, it’s crucial to prepare the area properly for the new one. Here are some key steps to focus on:
- Check and Fix the Surface: Carefully inspect the subfloor for damage or imperfections. Repair cracks, bumps or uneven spots to create a solid base for the new flooring.
- Manage Moisture Levels: Check the subfloor’s moisture levels to prevent mold growth or warping. Use moisture meters to obtain accurate readings. Take necessary measures to control moisture, such as adding vapor barriers or using water-resistant adhesives.
- Clean Up Thoroughly: Remove debris, adhesive residue and dirt from the subfloor surface. Use appropriate cleaning products and tools to create a clean and tidy space for the new flooring installation.
Following these steps, you can effectively prepare the area for the new flooring, ensuring a smooth and successful installation.
Cost Considerations for Removing Engineered Hardwood Floors
When considering the removal of engineered hardwood floors, it’s essential to consider its cost. Several factors can affect the overall cost:
- Labor Costs: Consider the expenses of hiring professional construction firms to remove the floors. While this option may be more costly, it offers the advantage of speed, expertise and reduced chance of errors.
- Equipment Rental or Purchase: Determine whether you need special tools such as floor scrapers, adhesive removers or power saws. Compare the costs of renting versus buying these tools and obtain estimates accordingly.
- Disposal Fees: Check for any fees associated with disposing of the old flooring materials. Inquire whether local waste facilities charge for the disposal of construction waste.
If you’re concerned about the cost of new engineered hardwood floors, read our blog, “How Much Does Engineered Hardwood Flooring Cost?” to get an estimate.
Deciding Between Professional Removal and DIY
Here is a table that compares hiring certified building contractors to do-it-yourself for removing engineered hardwood floors. It can help you choose the best option for your specific requirements.
| Factors | Professional Removal | DIY |
| Cost | Higher initial cost | Lower cost upfront |
| Expertise | Trained professionals | Requires DIY skills |
| Time | Faster completion | Longer duration |
| Convenience | Less involvement | Requires personal effort |
| Quality | Professional results | Depends on skill level |
| Risk of Damage | Reduced risk | Higher risk |
Repairing vs. Replacing Engineered Hardwood Floors
This table shows the differences between replacing and repairing engineered hardwood floors. It can help you decide which option suits your requirements and preferences.
| Factors | Repairing | Replacing |
| Cost | Lower Cost | Higher cost |
| Extent of Damage | Suitable for minor damage | Necessary for extensive damage |
| Time | Faster turnaround time | Time-consuming |
| Aesthetic Impact | May not match the existing floor perfectly | Opportunity for new design |
| Durability | Depends on the extent of the repair | Fresh installation offers longevity |
| Convenience | Minimal disruption to space | Requires relocation during installation |
Elevate Your Space with Premium Engineered Hardwood Flooring
Correctly removing engineered hardwood floors is essential to preserving the flooring and the underlying subfloor. Proper techniques and tools can help homeowners minimize the risk of damage and simplify the removal process. Whether opting for DIY removal or hiring professionals, consider cost, expertise and time to determine the best approach for your requirements.
At Villagio Wood Floors, we understand the importance of maintaining the integrity of your flooring investments. As a wholesaler of engineered hardwood, we prioritize offering high-quality, durable, architect-grade and visually appealing products. Our range of engineered hardwood options provides aesthetic versatility and structural stability for interior designers, ensuring a reliable foundation for any space. Explore our selection and find flooring solutions that enhance your environment while meeting your practical requirements.
How to Remove Engineered Hardwood Floor Without Damages – FAQs
How do I decide between repairing and replacing engineered hardwood floors?
When deciding whether to repair or replace your engineered hardwood floors, consider the extent of damage, overall condition and budget. You can fix minor issues like scratches or small dents. However, if there’s significant damage or wear, it is advisable to replace them.
What are the environmental impacts of removing engineered hardwood floors?
Removing engineered hardwood floors can have the following effects:
- Disposal of materials
- Energy consumption during the removal
- Potential concerns about air quality due to dust and debris
Adopting eco-friendly practices such as responsible disposal and minimizing energy usage can help reduce these impacts.
How can I dispose of engineered hardwood flooring responsibly?
You can responsibly dispose of engineered hardwood flooring by recycling it, donating reusable materials or utilizing sustainable waste management services. It’s important to adhere to local regulations for proper disposal.
What should I do to prepare my subfloor for new flooring after removal?
After removing the old flooring, preparing the subfloor for new flooring involves cleaning, leveling and addressing any damage or irregularities. Preparation may also include removing adhesive residues, repairing cracks and applying primers or sealants to create a suitable foundation for installation.