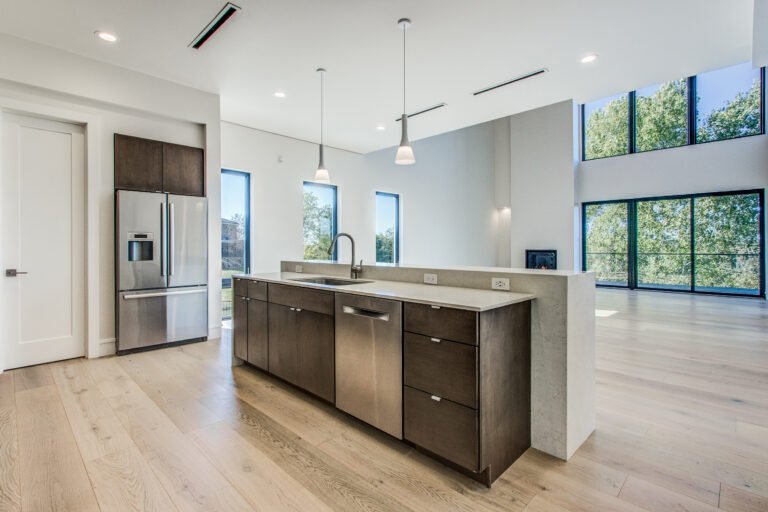
Elevate Your Space: Engineered Hardwood Flooring Installation Made Easy
Start transforming your home or workspace with engineered hardwood flooring installation. Engineered hardwood has become a popular residential hardwood flooring choice for its durability, versatility and aesthetic appeal. Whether renovating your existing space with a more contemporary style or starting a new construction project, understanding the different methods of installing engineered hardwood flooring is important to achieve a flawless finish. Whether you aim to do it yourself or want to learn about the process so you can ask the right questions of your hired contractor, this guide provides all the essential information and tips to help you obtain beautiful floors for your home.
What is Engineered Hardwood Flooring?
Engineered hardwood flooring consists of multiple layers of wood. Unlike traditional solid hardwood flooring, made from a single piece of wood, engineered hardwood is constructed with a core layer of plywood or high-density fiberboard (HDF) topped with a layer of hardwood veneer. This construction provides engineered hardwood with stability and resistance to moisture, making it suitable for use in areas where solid hardwood may not be practical, such as basements.

What are the Benefits of Using Engineered Hardwood?
The benefits of engineered hardwood include:
- Durability: Engineered hardwood surpasses solid hardwood in terms of durability due to its layered construction. It is less prone to warping, shrinking or expanding when exposed to moisture or temperature fluctuations.
- Versatility: Engineered hardwood can be installed in various environments, including basements and kitchens, where solid hardwood may not suit due to higher density levels.
- Cost-effectiveness: Engineered hardwood is a more affordable option than solid hardwood, making it a budget-friendly choice for homeowners seeking the look of hardwood flooring at a significantly lower price point.
- Easy installation: Engineered hardwood often comes in click-lock or tongue-and-groove systems, simplifying installation. Unlike solid hardwood, which typically requires nailing or stapling, engineered hardwood takes less effort to install.
- Wide range of styles: Engineered hardwood offers diverse wood species, colors and finishes. This extensive range allows homeowners to select a style that complements their decor preferences.
Learn more in our comprehensive guide, “What is Engineered Hardwood?”
Overview of Installation Process
The engineered hardwood installation begins with preparing the subfloor, ensuring it is clean, level and dry. Once the hardwood has had enough time to acclimate to the room’s conditions, a moisture barrier should be installed to protect against any potential moisture from the subfloor. It is of paramount importance to plan the layout properly, beginning from the longest and straightest wall and progressing towards the opposite wall.
Based on the chosen installation method, it is essential to install the planks accurately. Trim any excess planks to fit around obstacles. Finally, thoroughly inspect the flooring to ensure no flaws are present.

Pre-Installation Process
Following a series of pre-installation steps is mandatory to ensure a smooth and successful installation process.
Assessing Your Space
Begin by thoroughly assessing the kitchen, living room, bedroom etc, where you will install the flooring. Remove any existing flooring material or potential obstacles affecting the installation process.
Choosing the Right Type of Engineered Hardwood
Next, carefully select the appropriate type of engineered hardwood for your residential space(s). Consider the desired aesthetic, durability and compatibility with the room’s moisture levels and traffic patterns. Measure, remeasure and properly cut your hardwood plank stock to fit the various contours of the room’s floor area.
Preparing the Subfloor
Before choosing the installation method, ensure the subfloor is clean, level and free from debris or imperfections. Design options include wood species (e.g. oak, maple, walnut) and pattern (e.g. chevron, herringbone, select grade or custom/specialty). Use a moisture barrier to protect the engineered hardwood from potential moisture damage.
Type of Installation Methods
When installing residential hardwood flooring, you have several methods to choose from. These methods include:
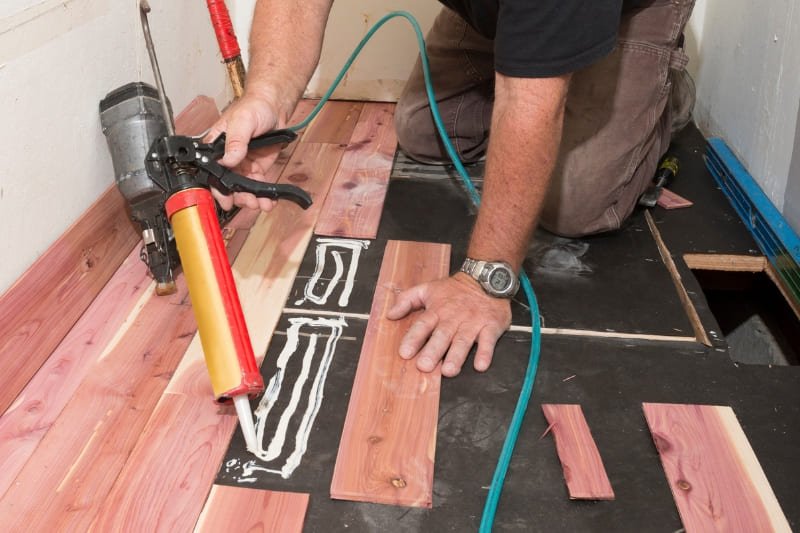
Glue-Down Method
The glue-down is one of the most popular methods for installing engineered hardwood in homes. It involves securely attaching the engineered hardwood planks directly to the subfloor using a strong adhesive. This method provides a secure, stable process resulting in long-lasting hardwood floors.
Tools Required
The tools necessary for a glue-down method include:
- Trowel
- Tapping block
- Rubber mallet
Step-by-Step Process
- Apply adhesive evenly to the subfloor using a trowel.
- Place each engineered hardwood plank into the adhesive, ensuring proper alignment.
- Press down firmly on each plank to securely adhere to it.
- To ensure a snug alignment, gently tap the planks into place using a tapping block and rubber mallet.
Pros of the Glue-Down Process
- Superior stability and durability.
- Professional-looking finish with minimal gaps or unevenness.
- Reduced risk of shifting or buckling over time.
Cons of the Glue-Down Process
- Time-consuming installation process.
- Precise adhesive application and curing time.
- Difficult to remove and may cause damage to the subfloor.
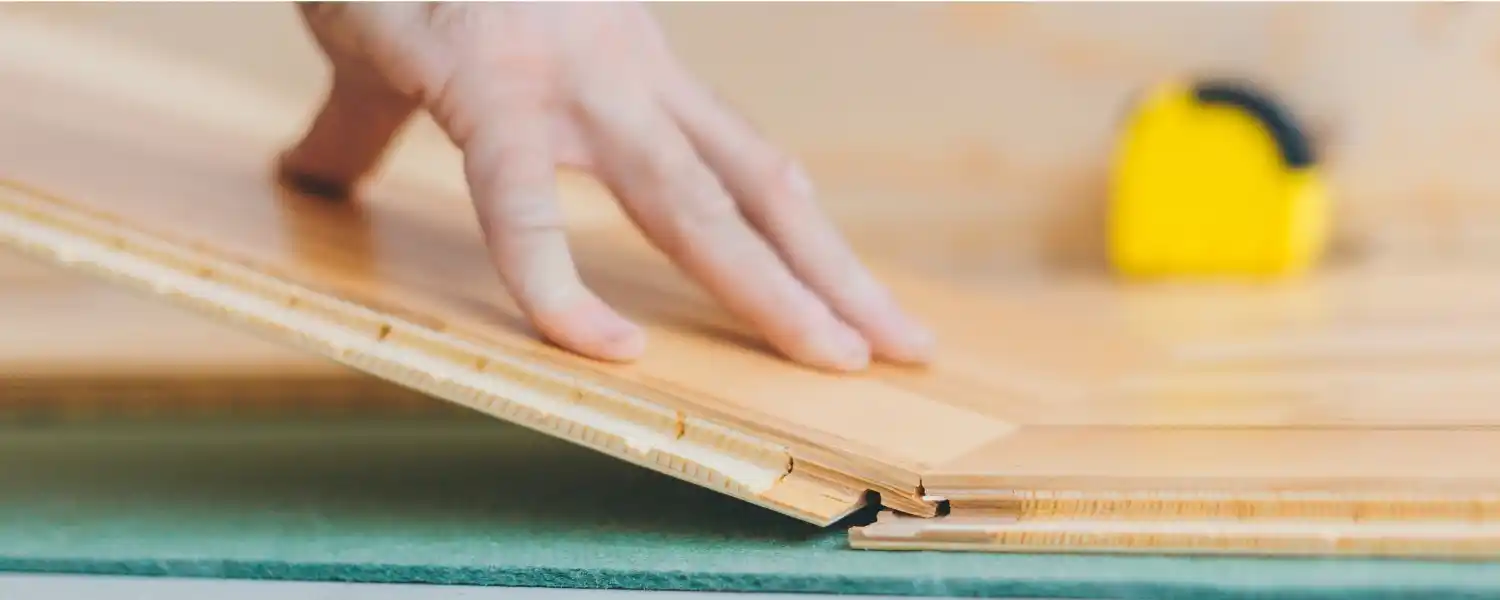
Floating Method
Floating is a popular and efficient method for installing engineered hardwood. Unlike traditional methods, it involves laying the plank over the subfloor without direct attachment, making for quicker, cleaner and easier installation.

Tools Required
The tools you will require for this method include:
- Underlayment
- Spacers
- Tapping block
- Rubber mallet
Step-by-Step Process
Here is the step-by-step process for installing engineered hardwood using the floating method:
- Lay down the underlayment over the subfloor.
- Place spacers along the perimeter of the room to create expansion gaps.
- Start laying the engineered hardwood planks, clicking or locking them together.
- Use a tapping block and rubber mallet to ensure a tight fit.
- Continue laying the planks row by row until the entire floor is covered.
Pros of the Floating Method
There are several advantages to using the floating method:
- Quick and easy installation process.
- No adhesive is required.
- It allows for the expansion and contraction of the flooring.
Cons of the Floating Method
There are a few disadvantages to consider with the floating method:
- Less stable compared to other installation methods.
- It may produce a hollow sound when walked upon.
- There are limited options for refinishing and repairing the flooring.
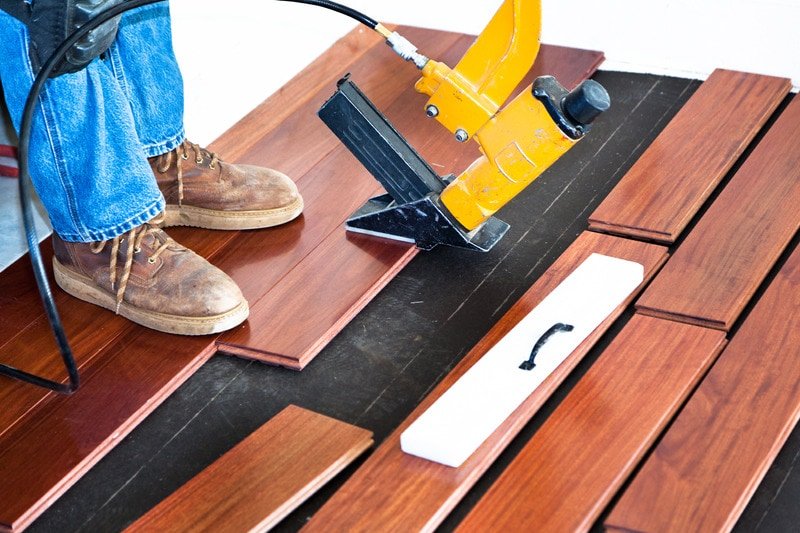
Nail-Down Method
The nail-down method is a traditional approach for installing engineered hardwood. It involves securing planks to the subfloor using nails, providing strong stability. However, this method requires specialized tools and may result in visible nail holes.
Tools Required
To perform the nail-down method, you will need the following tools:
- Pneumatic flooring nailer
- Compressor
- Nails
- Hammer
- Pry bar
Step-by-Step Process
Follow these steps for the nail-down method:
- Begin by laying down the underlayment over the subfloor.
- Position the first row of engineered hardwood planks against the starting wall.
- Use the pneumatic flooring nailer to drive nails through each plank’s tongue at a slight angle, securing them to the subfloor.
- Continue installing the subsequent rows of planks, ensuring a tight fit, and use the nailer to secure each plank.
- Use a hammer and pry bar to fit the last row against the wall.
Pros of the Nail-Down Method
The nail-down method offers the following advantages:
- It provides a secure and stable installation.
- It offers excellent resistance to shifting or bucking.
- It is easy to remove and replace.
Cons of the Nail-Down Method
There are a few drawbacks to consider with the nail-down method:
- It requires specialized tools and equipment.
- The installation process is time-consuming.
- The nail holes are visible, requiring additional finishing steps.
Learn to install engineered hardwood on concrete from our guide, “Installing Engineered Hardwood On Concrete“
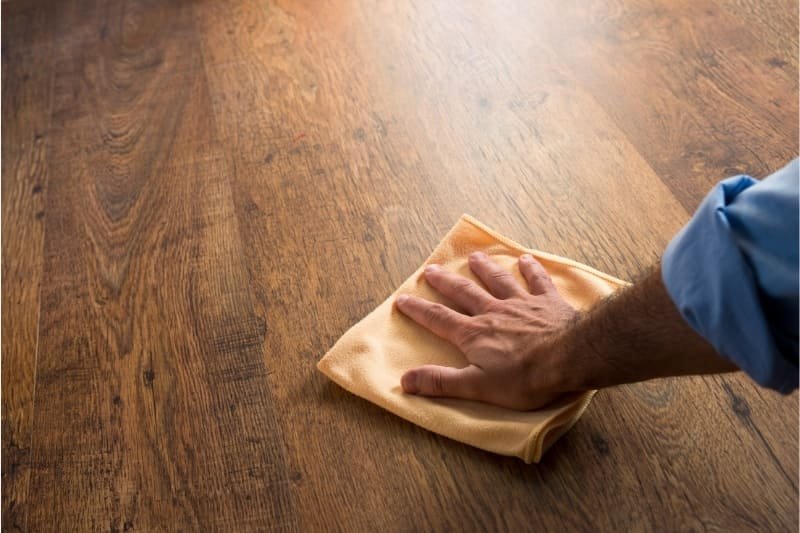
Post Installation Steps
Post-installation steps are essential to ensure that your flooring lasts. They are necessary for protecting your investment and maintaining its aesthetic appeal. Here are some tips for cleaning and maintenance:
Cleaning and maintenance tips
- Regularly sweep or vacuum the floors to eliminate dust and debris.
- For routine cleaning, use a damp mop or hardwood floor cleaner.
- Avoid using harsh chemicals or abrasive cleaners that may harm the finish.
- Place pads under furniture legs to prevent scratches.
- Protect high-traffic areas by using rugs or mats.
Learn to clean your engineered hardwood in detail from our previous blog, “How to Clean Engineered Hardwood Floors?“
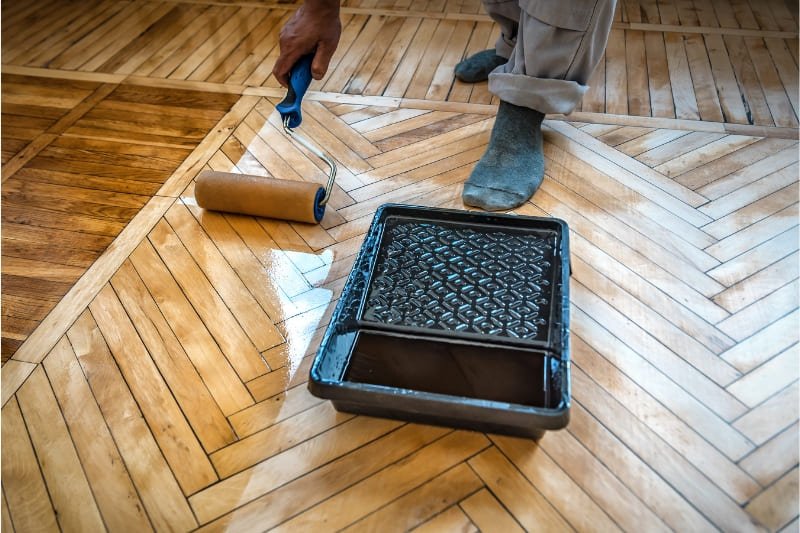
How to apply finish and protect your new floors
Now, let’s move on to applying finish and protecting your new floors:
- Select a high-quality hardwood finish suitable for pre-finished engineered hardwood floors.
- Follow the manufacturer’s instructions to apply the finish using a clean applicator.
- Allow the finish to dry completely before walking on the floors.
- Consider applying additional coats of finish for extra protection.
- Use furniture pads to avoid dragging heavy objects across the floor to prevent scratches and damage to the finish.
Common Mistakes and How to Avoid Them
Overlooking Room Preparation
One common mistake while installing engineered hardwood flooring is overlooking proper room preparation. The preparations include ensuring the subfloor is clean, level and debris-free and acclimating the flooring to the room’s temperature and humidity. If the floor is not prepared properly, it can result in uneven flooring.
Incorrect Use of Tools
Another mistake is the using tools incorrectly during the installation process. Using the wrong tools or using them improperly can result in damaged planks and uneven seams. Knowing the right set of tools before installation is essential to avoid mistakes.
Failing to Follow the Manufacturer’s Instruction
Another common mistake is failing to follow the manufacturer’s instructions, which can lead to various issues. The mistakes include improper installation techniques, incompatible products or neglecting important steps such as flooring acclimation. It’s crucial to carefully read and adhere to the manufacturer’s guidelines to avoid cancelling the warranty.
Hiring a Professional vs DIY Installation
Professional installation of engineered hardwood has both advantages and disadvantages. When you hire a professional, you can ensure the work is done by experts, resulting in high-quality and durable outcomes. Additionally, professionals often provide warranties, giving peace of mind and extra protection. However, this type of installation usually comes at a higher cost than DIY methods. It may require scheduling based on the installer’s availability.
On the other hand, opting for a DIY installation has its own set of advantages and drawbacks. DIY installation is cost-effective and allows you to have flexibility in terms of customization, scheduling and pace. Furthermore, completing a DIY home improvement project can be personally fulfilling. However, DIY installations require a certain level of skill and experience. Additionally, it may take longer to complete the project and could void any warranties.
Achieve Timeless Elegance: Install Engineered Hardwood Flooring
Engineered hardwood flooring is a versatile and durable solution for enhancing your space’s aesthetic appeal. Whether renovating an existing area or starting a new project, understanding the various installation methods is important to achieve a flawless finish. From the glue-down method providing excellent stability to the floating method offering quick and easy installation, there’s an option to suit every need.
Consider Villagio Wood Floors for all your engineered hardwood needs. Based in Southern California, Villagio Wood Floors is a wholesaler committed to providing high-quality flooring solutions for retailers and direct consumers. We offer durable, versatile and affordable options in various styles. Elevate the luxury of your space with Villagio Wood Floors and see how engineered hardwood can transform your residence.
Engineered Hardwood Flooring Installation – FAQs
Is it better to glue or float an engineered wood floor?
The choice between glue-down and floating depends on subfloor type, desired installation speed and personal preference. Gluing provides a more secure and stable installation, while floating is quicker and more DIY-friendly.
Is underlayment necessary for engineered hardwood floors?
Yes, underlayment is necessary for engineered hardwood floors. It provides cushioning, sound absorption and moisture protection and helps smooth out minor imperfections in the subfloor.
What is the best method to install engineered hardwood flooring?
The best method of installing engineered hardwood flooring depends on the subfloor type, the manufacturer’s recommendations and personal preference.
Why is my engineered wood floor lifting?
Moisture, improper installation, subfloor problems or structural issues are several possible root causes for engineered hardwood floor lifting.
Can you lay engineered wood yourself?
Yes! With the necessary tools and skills and following proper installation guidelines, you can lay engineered wood yourself. However, hiring a professional installer may be advisable for complex installations or if you’re unsure about your abilities.
How long does it take to install engineered flooring?
The time it takes to install engineered flooring depends on various factors, such as the installation method, room size, subfloor condition and project complexity. Installations can take anywhere from a few days to a week to complete.