Installing Engineered Hardwood on Concrete
Installing engineered hardwood on concrete is a popular way to transform a cold, unwelcoming space into a warm, cozy one. Engineered hardwood offers the beauty of natural wood with added durability and stability, making it a preferred choice for areas where solid hardwood may not be suitable, such as basements or areas with high humidity levels. Installing engineered hardwood on concrete requires specific steps and considerations to ensure a successful and long-lasting result. This blog will explain all the steps in installing engineered hardwood on concrete.

What are the Advantages of Installing Engineered Flooring on Concrete?
Engineered hardwood flooring offers many advantages over traditional solid hardwood, particularly in environments where moisture levels can fluctuate. The following are the many benefits of using engineered hardwood:
- Engineered hardwood is resistant to moisture, unlike solid hardwood.
- It has a multi-layered structure that makes it more durable and stable.
- It suits various environments, including basements and homes built on a slab foundation.
- It can be installed as a floating floor, which makes installation faster and easier.
- It is resistant to warping, shrinking, or expanding.
- It is available in various styles, finishes, and wood species.
- It is an eco-friendly option.
Learn more about engineered hardwood flooring in a comprehensive post, “What is Engineered Hardwood Flooring?“
Importance of Proper Installation
Proper installation of engineered hardwood is important for several reasons:
- It ensures the longevity and durability of the flooring as correctly installed floors will resist issues such as warping, buckling, or gaps between planks.
- Proper installation ensures optimal performance, including stability and sound absorption.
- A well-installed engineered hardwood floor enhances the room’s aesthetic appeal by providing a seamless and visually appealing surface.
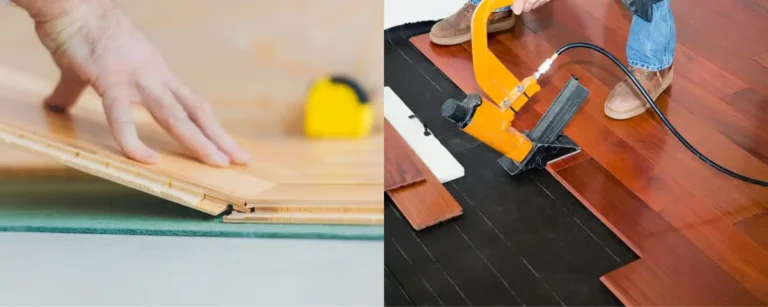
Types of Different Methods of Installing
It is important to have a good understanding of the various methods used for installing engineered hardwood. There are traditional methods, such as nail-down and glue-down, and newer techniques, like floating. Each approach has its advantages and considerations. Let us explore and gain a better understanding of the different types of installation methods.
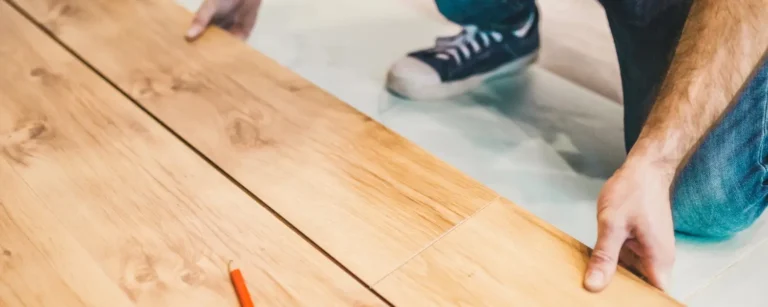
Floating Method
Engineered hardwood planks provide a versatile flooring option. They are usually installed over various subfloor types and are not attached to the subfloor, allowing expansion and contraction. This feature makes them a popular choice for DIYers.

Nail Down Method
The nail-down method involves securing the planks to the subfloor using nails or staples. This method is suitable for high-traffic areas and requires plywood and specialized tools. However, we do not recommend it for concrete floors.
Glue Down Method
The glue-down method uses flooring glue to attach the planks directly to the subfloor. This method offers excellent stability and sound absorption and is suitable for concrete and plywood subfloors. However, it requires careful subfloor preparation and longer installation times.
Pre-Installation Preparation
Pre-installation preparation is the first step when installing engineered hardwood. These initial steps set the foundation for proper installation and minimize potential issues. Let’s learn how to do pre-installation preparation.
Tools and Materials Needed
The first step in the pre-installation process is to gather all the necessary tools and materials, which include flooring adhesive, underlayment, moisture barrier, measuring tape, level, saws, and safety equipment.
Acclimating the Engineered Hardwood
It is important to acclimate the engineered hardwood to its environment before installation to avoid problems such as warping or buckling. To achieve this, store the flooring in the room where you plan to install it for 48 to 72 hours. This time will allow the flooring to adjust the room’s temperature and humidity.
Assessing the Concrete Subfloor
It is crucial to inspect the concrete subfloor for any damage or unevenness before installing engineered hardwood to ensure a smooth and stable surface for the final flooring.
Moisture Testing and Mitigation
It is important to test the moisture levels of the concrete subfloor to prevent problems caused by moisture, such as mold growth or flooring damage. If the moisture levels are too high, immediate action by sealing or installing a moisture barrier is essential.
Choose the Installation Method
When choosing the appropriate installation method, consider the subfloor types, environmental conditions, and personal preferences.
Subfloor Preparation
The second step is preparing the subfloor. For proper installation, the subfloor should be smooth, level, and moisture-free. Let’s learn how to prepare your subfloor before installation.
Cleaning and Leveling the Concrete
Thorough cleaning is essential to remove debris, dirt, or adhesive residues that could affect the installation. Level the concrete surface using a suitable leveling compound to eliminate high spots and low areas. It ensures a smooth surface for the installation of engineered hardwood.
Installing a Moisture Barrier
Moisture can threaten engineered hardwood flooring, especially when installed over concrete subfloors. Installing a moisture barrier helps prevent moisture from reaching the hardwood planks, reducing the risk of warping, buckling, or mold growth.
Addressing Unevenness and Imperfections
Addressing any unevenness or imperfections in the subfloor before installing engineered hardwood flooring is of the utmost importance. This process may involve sanding down high spots, filling low spots, or repairing damaged areas. A flat and smooth subfloor helps prevent issues such as gaps or unevenness in the final surface of the flooring. Therefore, properly preparing the subfloor is essential for achieving a long-lasting and visually appealing installation.
How to Install Using Floating Method
Installing engineered hardwood on concrete using the floating method is a popular and relatively straightforward process. This method involves laying the planks over an underlayment without attaching them to the subfloor. It is ideal for various subfloor types. Below is a step-by-step guide to help you install engineered hardwood using the floating method:
- Gather Materials and Prep Subfloor: Collect necessary tools and ensure the subfloor is clean, dry, and level.
- Lay Underlayment: Roll out underlayment, ensuring it overlaps at seams and extends up walls.
- Acclimate Flooring: Stack the planks in the installation room for 48 hours to acclimate.
- Plan Layout: Determine the starting point and direction of installation, considering the room dimensions and aesthetics.
- Begin Installation: Lay the first row of planks along the starting wall, tongue side facing the wall, and use spacers for the expansion gap.
- Install Subsequent Rows: Click tongue and groove edges together, using a tapping block and hammer to ensure tight joints.
- Cut Planks as Needed: Use a saw to fit planks at the ends of rows or around obstacles and maintain ¼ inch expansion gap.
- Complete Installation: Continue installing until the floor is covered, then install baseboards to cover the expansion gap.
- Inspect and Adjust: Check for gaps or imperfections and adjust until you achieve a flawless finish.
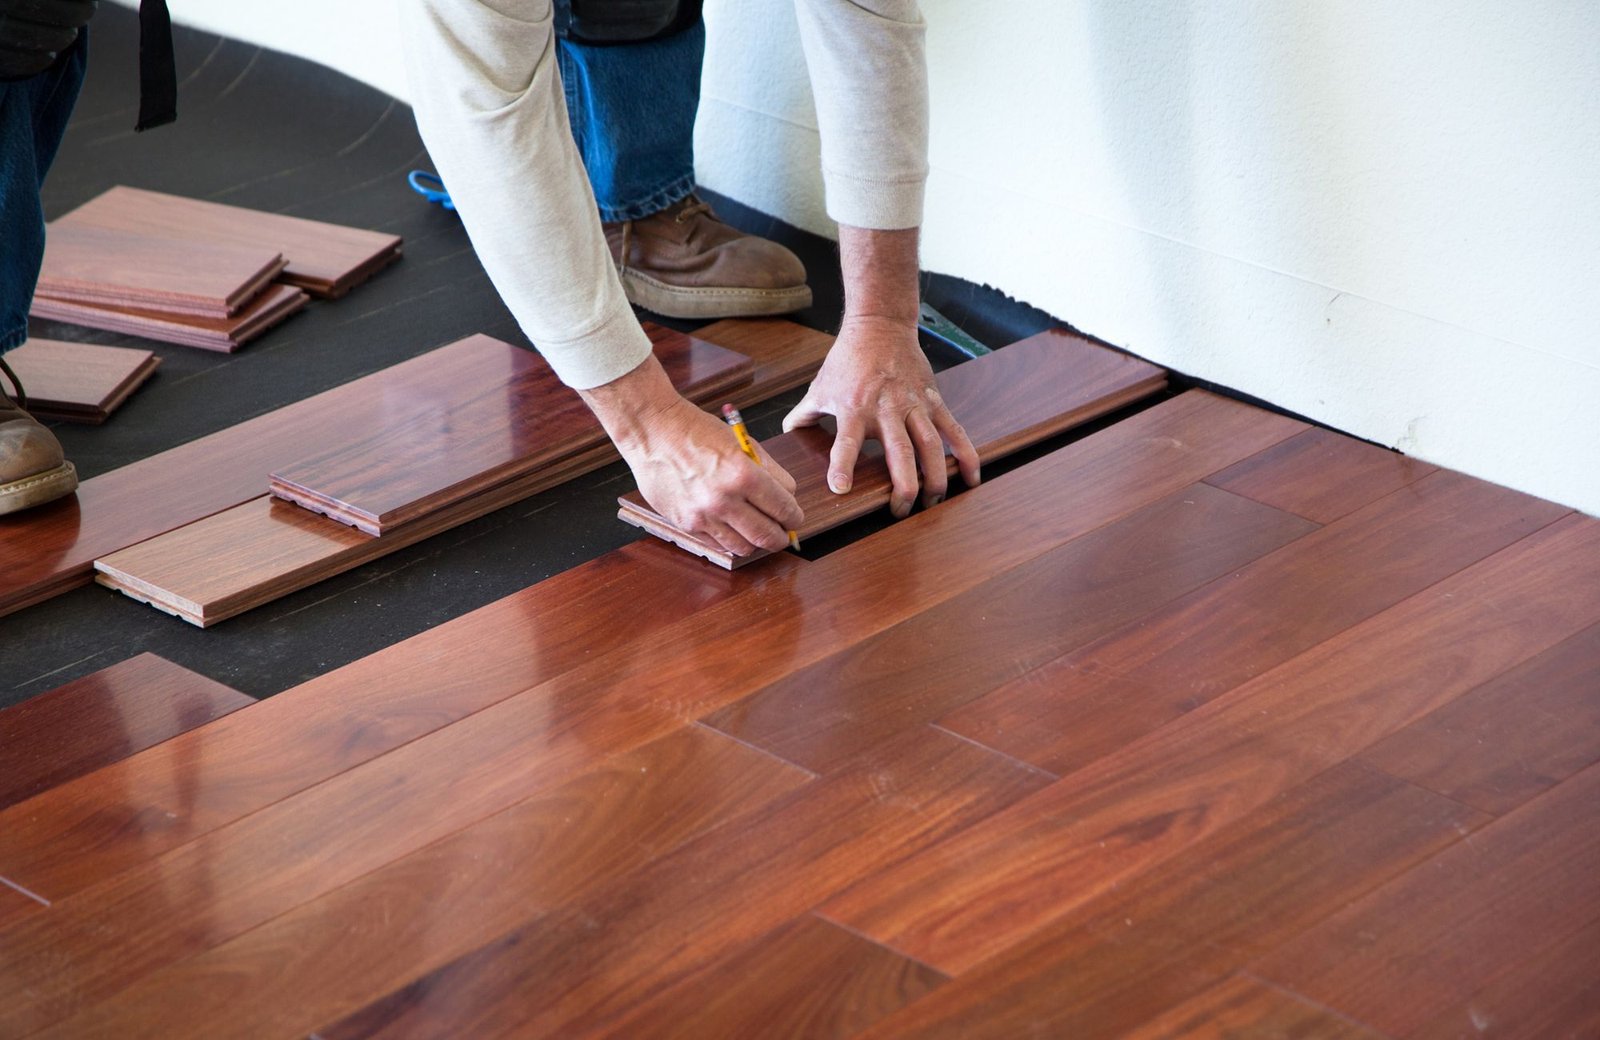
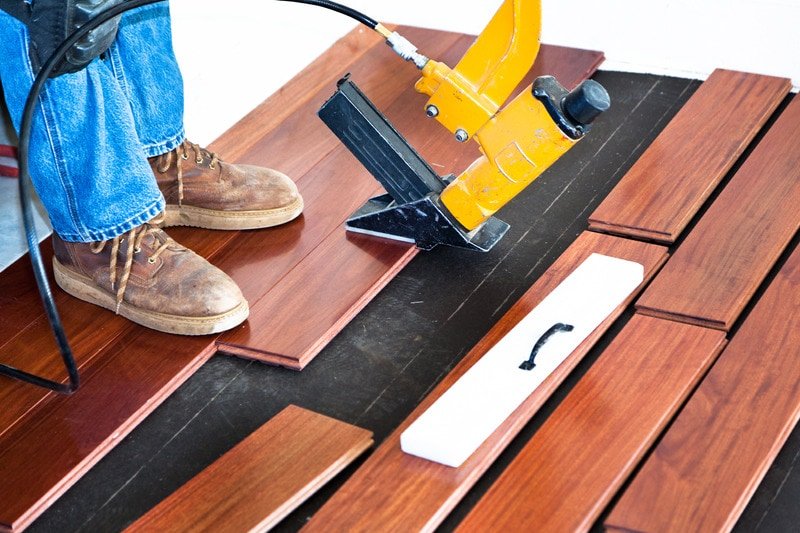
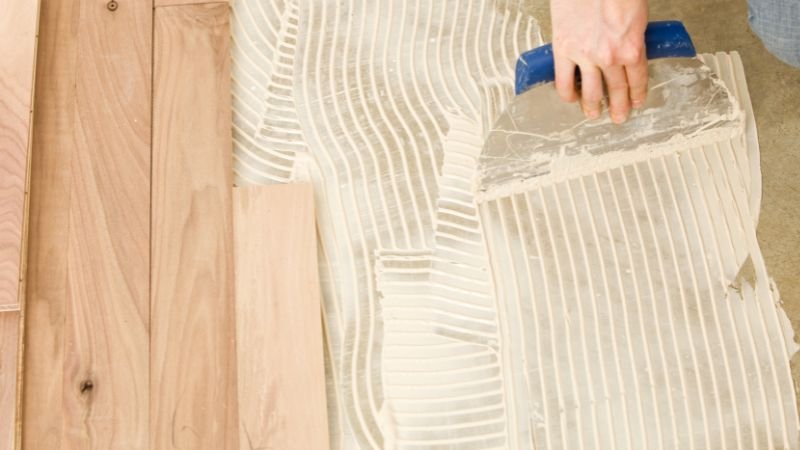
How to Install Using Glue Down Method
The glue-down method offers stability and durability when installing engineered hardwood on concrete. Follow these steps for successful installation:
- Preparation: Ensure the subfloor is clean, level, and free of debris and moisture.
- Acclimation: Allow the hardwood planks to acclimate to the room for at least 48 hours.
- Layout: Plan the layout, starting from the longest and straightest wall. Leave an expansion gap between the wall and the planks.
- Adhesive Application: Apply flooring adhesive to the subfloor in small sections.
- Installation: Press the planks firmly into the adhesive. Use a tapping block and rubber mallet to ensure a tight fit.
- Trimming: Cut the planks to fit around obstacles, leaving the necessary expansion gap.
- Finishing: Wait for the adhesive to dry before installing baseboards or trim to cover the expansion gap.
Learn to install engineered hardwood on other various surfaces from our blog, “Engineered Hardwood Flooring Installation“
Post-Installation Procedures
The completion of the installation is often marked as a milestone. However, post-installation is the final step. Let’s learn how the post-installation procedure is done.
Trimming Excess Underlayment
Trimming excess underlayment along the flooring’s edges is important to creating a clean and professional finish. Use a utility knife or scissors to carefully trim the underlayment, ensuring it is not visible.
Filling Expansion Gaps
Expansion gaps are necessary for the natural expansion and contraction of the hardwood flooring. After installation, fill the gaps with an appropriate material to create a smooth surface while allowing for wood movement.
Installing Transition Strips
Transition strips create a smooth transition between different types of flooring or rooms. Install transition strips where the engineered hardwood meets other types of flooring, such as carpet, tile, or vinyl, to create a cohesive and finished look.
Cleaning Up
After completing the installation and any necessary post-installation procedures, thoroughly clean the engineered hardwood flooring to remove any debris, dust, or adhesive residue. Use a vacuum or broom followed by a damp mop with a mild cleaning solution to ensure the floor is clean and ready for use.
Addressing Common Issues
During the installation process or over time, engineered hardwood flooring may present some common issues. Here are some effective solutions to address these challenges:
Dealing with Moisture Problems
Moisture can damage engineered hardwood flooring, leading to warping, buckling, or mold growth. To prevent moisture damage, ensure proper subfloor preparation, use a moisture barrier, and maintain optimal indoor humidity levels.
Repairing Damaged Boards
Over time, engineered hardwood boards may become damaged due to heavy foot traffic, furniture scratches, or other factors. To repair damaged boards, use wood filler to fill in scratches, sand the area smooth, and refinish the board as needed to restore its appearance.
Addressing Squeaks and Creaks
Squeaks and creaks in engineered hardwood flooring are often the result of movement between the boards and the subfloor. To resolve this issue, secure loose boards by adding screws or nails through the subfloor into the joists below, or use specialized floor squeak repair kits to eliminate these noises.
Mastering Installing Engineered Hardwood on Concrete
Transforming any space with durable and versatile engineered hardwood flooring on concrete subfloors is now easier than ever. Homeowners and professionals can ensure a seamless and long-lasting flooring project by following proper installation methods, pre-installation preparation steps, and effective solutions for common issues.
Villagio Wood Floors, offers premium engineered hardwood flooring options to retailers in California and other states. We specialize in distributing high-quality, durable, and aesthetically pleasing flooring solutions. Our extensive range of products caters to all types of flooring needs. Browse our collection today and select the best option for your customers.
installing engineered hardwood on concrete FAQs
Can engineered hardwood be installed directly on concrete?
Yes. You can directly install engineered hardwood on a concrete subfloor, but it requires proper preparation. It typically involves addressing moisture issues, using the appropriate adhesive, and following manufacturer guidelines for installation over concrete.
What are the potential challenges or considerations when installing engineered hardwood on concrete?
When installing engineered hardwood on concrete, some potential challenges or considerations include moisture levels in the concrete, proper subfloor preparation, choosing the right adhesive, and ensuring the planks are sufficiently acclimated.
Can I install engineered hardwood on a concrete basement floor?
Yes, it is possible to install engineered hardwood on a concrete basement floor. However, it’s important to address moisture issues as basements tend to have higher moisture levels. Conducting moisture testing, using a moisture barrier, and choosing the appropriate adhesive is essential to ensure successful installation in the basement environment.